Tips for Painting Your Exterior High Gable

Tips for Painting Your Exterior High Gable

Having trouble painting the high gable end of your home in Eugene, Oregon? The high gable end of your home can be a tricky place to access when you want to paint or carry out general maintenance. Unfortunately, this very difficult to access the high end of the house always needs re-painting even if the rest of the house is looking ok. But why?

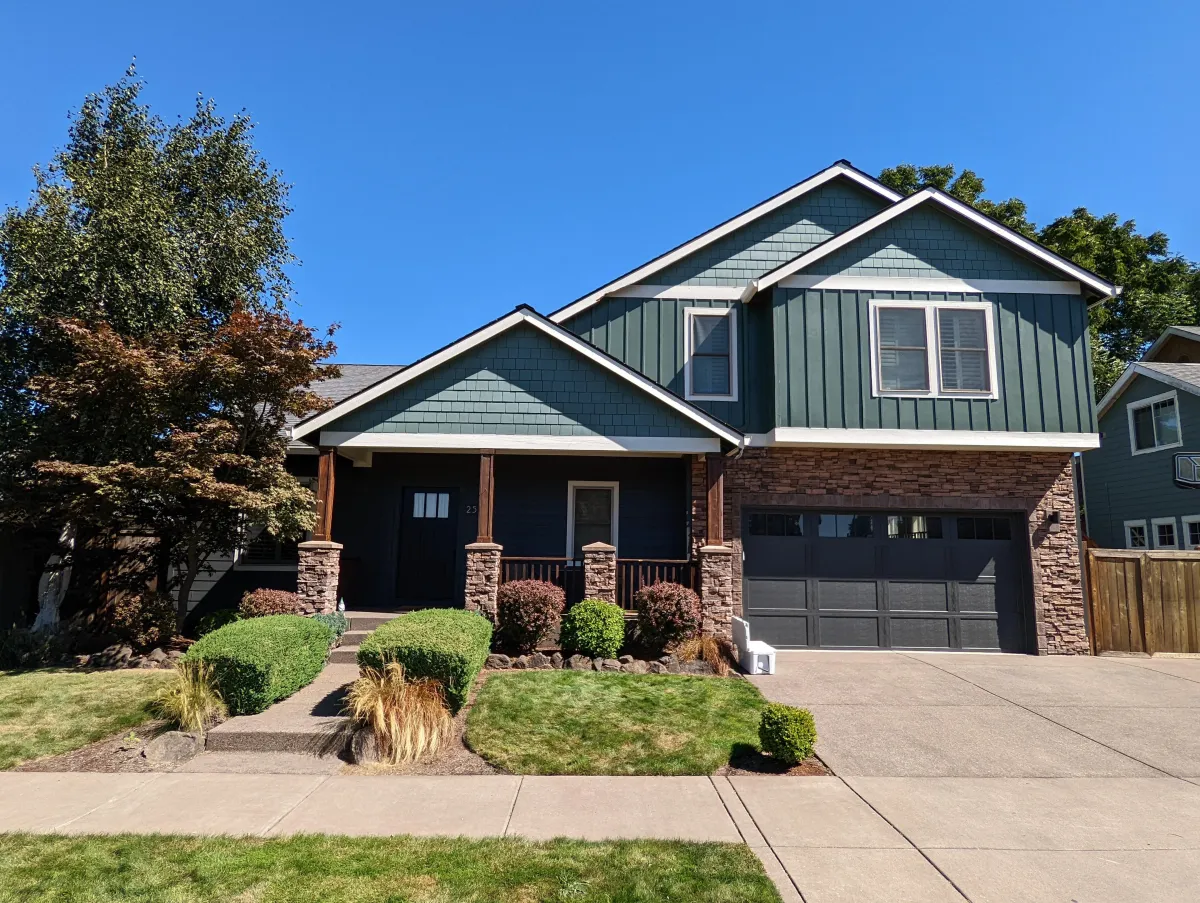
A high gable end of a house is often found on a split-level house or a 2-3 story house. Many times, it’s a wall that is forgotten about, especially if it is not in view, or maybe down a side alleyway. Most exterior gable end wall surfaces are often at the receiving end of harsh weather elements such as wind-driven rain and extended sunlight exposure.

With that in mind, it’s not difficult to understand why your gable end and high peaks of your split level or multi-story home will require more frequent paint jobs than the rest of your home. Painting your own home may not only save you some money on labor, but it’s also satisfying to stand back at the end of each day and see what you’ve accomplished

However, exterior painting almost always requires the use of ladders, and if your house has a gable end, this task can be quite daunting. To make your paint job successful and safe, here are some tips and guidelines you should consider following.

Using a Ladder

In nearly all the cases, you will require an extension ladder to access a high gable. Consider buying or renting (or borrowing) a painters’ extension ladder that is long enough to reach the highest point of your gable. Trying to use a shorter ladder will have you stretching to reach the areas to be painted, and that can be risky.

Check to see that the ladder you plan to use is in a perfect working condition with no bent side rails and rungs, and the locking mechanism is intact. Position your ladder about one-quarter of the extended length away from the wall, on level ground.

If your house is located on sloping or uneven ground, you might want to rent or buy ladder levelers. Different types of levelers work differently, some attach to the ladder rails so you can adjust the feet to compensate for uneven ground, and others provide a secure level platform that you can place your ladder on.

When setting up your ladder, always make sure that the ladder is within a comfortable reach. Set it up at a height that is just below the area you need to paint. Your body should always be centered on the ladder while still being able to effectively work on the areas that you want to scrap and paint. To maintain your balance, always keep one hand on the ladder and work using the other hand. You may also want to get a paint can hook and secure your paint can at a convenient spot on the ladder when painting.

Brush and Sprayer Extenders

Sometimes you may not get just the height of a ladder that will reach your gable, other times the tricky configuring and location of your gable, such as above the garage, may make it difficult to fully utilize your ladder. In this case, an extension tool can be a great helping hand, literally.

You can purchase a brush extender, which allows you to clip the brush securely to the end of an extension pole. For spraying, use a spray tip extender. This is a lightweight metal tube that attaches to the spray gun. So you essentially need to screw the spray rip at the end of the extender and you will be able to reach high areas.

Gables on Split-Level Homes

Accessing gables on split-level homes can be particularly tricky, especially if your house is on a slope. If you can get away with accessing the gable on your split-level home by walking on the roof –that’s ok. But just be sure to do so in the morning before the roof becomes hot. Some gables can also be accessed via the window, which saves you the hassle of setting up a ladder. Be sure to place some drop cloths or a painters’ canvas on the roof to protect it from paint drips and spills.

Bottom Line

High exterior gables are some of the hardest to access areas that make DIY painting a nightmare. While the above tips might help make the process a little easier and safer, it’s probably still a good idea to hire a painting contractor for such delicate projects.

Helpful Tips for Choosing Exterior Paint Colors

Helpful Tips for Choosing Exterior Paint Colors

Choosing paint colors for your home’s exterior can be quite challenging. If you pick bland colors your house may look featureless and flat… However, if you pick paint colors that are too bold the architecture of your house might be overwhelmed –and may upset your neighbors in the process.

Choosing the right color combination for your home’s exterior can transform your home unbelievably. The best paint colors will highlight the most beautiful features of your home. Skillful use of color can even disguise design flaws, boosting the curb appeal and market value of your home.

Here are some tips to help you pick complimenting color combinations:

1. Keep It Simple

Sometimes the best approach is to keep your choices simple but thoughtful. You can do this by focusing on two or three colors for those two or three important exterior elements. So you essentially need to pick the main color for the body of your house, a color for the trim –windows, overhangs, and fascia – and an accent color for the shutters or doors.

If you have a single story home, two colors will be probably enough. However, if you have a split level or two-story home, you might want three colors. Just be sure to enhance the good features and use the more reserved neutrals on less interesting features such as the gutters.

2. Consider the Trends

Exterior paint colors are generally getting lighter –with many homeowners going for light to medium hues. When you go for your color consultation at your local paint store, keep in mind that color samples will always look darker in the room than they will outside –especially for the pinks and yellows. If possible, paint a small portion at the back of your house and see how you feel about it over time. Ask your neighbors and friends for input.

3. Keep Your Neighbors in Mind

While we encourage you to pick unique and personal colors, we also suggest you choose colors that don’t clash with your neighbors… Take a look around your neighborhood – Does your house architecturally look like the house next door? Are you in the suburban location where your neighbors are mostly trees? Pick colors that coordinate with your surrounding –without necessarily copying.

4.  Find Inspiration in Your Living Room

Sometimes you can find great inspiration from colors used inside your living room. Generally, exterior colors should harmonize with the interior. While it might seem unrealistic and even comical to paint your entire home based on your pillowcase patterns, this can be a good approach when nicely used. Use the color of your interior décor and furnishing as a guide for selecting your interior paint colors –and your interior paint colors will in turn influence the colors you use on your exterior. The bottom line is to harmonize inside-out.

5. Don’t Forget the Roof

Some homeowners tend to forget the roof when choosing their exterior siding colors. Your roof, which could be asphalt, shingle, metal, terracotta, slate, or clay, comes with its own color. Your exterior siding paint color doesn’t need to match the roof, but it should harmonize. When choosing exterior paint, start with what’s there already. It’s much harder to replace your roof than your siding paint.

Consider the following possibilities…

•    To make your home more dynamic, choose opposite colors on the color wheel, but tone down on the brighter and bold colors.

•    Blue can be a quite daring color choice for the exterior, but when light shades of blue are used alongside a white trim and greenery nearby, they create a nice clean look.

•    If you have a Victorian home, you can accentuate those wonderful details by use of varied colors and sharp contrasts to show off those features. You can get more color ideas on this one from historic color charts.

•    If cost is an issue, you can use a single color for walls and anything on them like vents, and then put detailed colors on trim and the ends of eaves.

•    If you don’t want the garage door to stand out, you can paint it the same or slightly darker/lighter than the main exterior color.

Using the above tips combined with your individuality and style can help you create a charming and lovely home exterior. If you need help painting the exterior of your home in Eugene, Oregon, we would be more than happy to help. Call us today for a free estimate!

5 Reasons to Hire a Professional Painter for Your Home’s Exterior

5 Reasons to Hire a Professional Painter for Your Home’s Exterior

When it comes to painting the exterior of a multi-level or multi-story home with tall walls and lots of hard to reach areas in Eugene, Oregon, you’re better off hiring a professional painting company for your safety.

While DIY painting is an option, painting the entire exterior of your own home is not an easy task… You may make mistakes that can leave the exterior looking slightly unattractive, with chances of peeling, bubbling or fading happening sooner rather than later.

Here are 5 reasons to hire a professional to paint your home in Eugene, Oregon:

1. Safety

If your house is multilevel or has more than one story, it can be extremely difficult to paint its exterior. You’ll need to paint some difficult to access areas such as high-end gables or eaves. If you are using ladders, you have to get down and move the ladder every time you want to move sideways. This is very time-consuming and dangerous, and the risk is even higher if your multi-level home is located on a slope. Hiring a professional painter can help you stay safe!

2. Save Money and Time

Painting your residence might seem like a fanciful DIY project to undertake with friends over the weekend. However, keep in mind that you will be starting from scratch in terms of planning and execution. If you have the skills and tools required, DIY can save you some money on labor.

However, many times, homeowners don’t have the skills and experience required to pull off a perfect exterior paint job. You’re more likely to take more time and exceed your budget due to the fact that you have to buy or rent most of the required equipment. For professional painters, this is what they do for a living –and they have invested in the best quality tools, equipment, and training.

3. Quality Results

While anyone can paint, there is a lot more that goes into exterior painting than just changing the color on your wall. It’s more than just picking up the brush and the paint –the primary goal is to transform your home, add value, and prevent further damage on the exterior surface.

Whether or not you’re selling your house soon, you need to maintain its value in order to avoid costly repairs. Professionals are reliable and deliver the best results. They do thorough work and ensure the home is looking amazing and the paint job retains its beauty and protective properties for the longest time.

4. Structural Stability

Hiring a painting expert gives you an advantage of receiving a free exterior audit of some sort. Before painting begins, a professional painter will go around your house assessing the situation of your paintwork. During this assessment, they can easily spot decay or rot in your housing structure. Small weaknesses can significantly impact your home in the long term. They can also advise on the best way to fix the defect before painting can commence.

Water leakages and vapors can enter the walls through structural weaknesses and cause mold growth or rot. A professional painter can recommend a good craftsman to fix the structural defect. Following that with a good paint job can protect your exterior surface against water vapor damages.

5. Tools and Equipment

Painting experts have the best tools and equipment. Given that painting is what they do for a living, they have more likely invested heavily in acquiring high-quality equipment, materials, and tools to do the job right and quickly –from sprayer applicators and painters’ ladders to on-site paint mixers and power washing machines, in turn, allows pro painters to produce uniform coverage, texture, and tone for a long-lasting paint job.

If you’re considering repainting the exterior of your home, you now have enough reasons to hire a professional painter. Professional painting contractors bring to the table the training, skills, experience, reputation, and equipment that you can trust for high-quality and long-lasting results. Call us today or book now and we would be happy to provide you with a free estimate and a remarkable exterior paint job that offers true value for your investment!

Can’t Reach Those Hard-to Paint Spots? Here is How…

 It is quite simple for a homeowner to paint any surface that is easy to access. However, a majority of homes owners have surfaces that are very difficult to access, posing a big challenge during the painting process. Some of these areas include the eaves of the house, spots behind cabinets that will show when the carpentry has settled and so on. 

Thankfully, today we’re sharing simple but effective tips and tricks that anyone can adopt when painting surfaces that are difficult to access and still produce the best results. Have a look;

Have Good Ladders

As obvious as it might seem, ladders greatly supports a painter’s job when it comes to reaching those difficult to reach spots. To make your work easier, you will be required to assemble an assortment of ladders from tall to shorter ones to enable you to reach certain areas. Each ladder will help you access the hard to reach spots up to a specific level of the surfaces being painted.

While you could probably get to the top of a six-foot wall by standing on your tiptoes, your back will suffer later and your painting quality can be compromised by straining for long periods. For this reason, you should utilize your ladders effectively as this will give you an easy time when painting any tricky, high areas.

Use Extender Arms on Your Brushes and Rollers

Fixing extender arm on your brush and roller is the most important approach that will enable you to paint some of the hard to access points without necessarily using your ladder. An extender will hold tightly onto your roller or brush and facilitate a higher reach to the apex of your wall.

These extensions arms will enable you to apply the paint up to the height of six feet or more with a simple swap that spreads the paint across the wall without even moving your body. The only downside of using such tools is that extension arms are difficult to control if you don’t do your initial pre preparations well.

Use Paint Pads on the Edges  

In case you have tricky spots to edge such as a tight spot on the roof space of a home, a paint pad can help you perform your job easily without straining. Different forms of paint pads have diverse paint holding capabilities hence there is a need to check the manufacturer’s instructions on how to use it.

Cut In With Curved Rollers

Corners are the most complicated areas when it comes to painting. Be it a spot where two walls meet, wall meeting a ceiling board or any mixture of the two will give you a headache when painting. Professional painters have devised an easier way of going about it through the use of curved rollers. They produce better results with an attractive finish on surfaces with sharp corners –you should give them a try.

Painting Cylindrical Spots

As a DIY painting enthusiast, many times you will be required to perfectly paint cylindrical objects. Thankfully, the invention of a roller brush made this task a little less of a hassle. The brush is made of five individual rollers that are fixed with springs giving it an elastic frame. This brush offers the best solution for painting cylindrical surfaces. Even if you have pipes that require a fresh coat or small columns in your entrance, painting with roller brush can be done in a single paint coat without any noticeable shadow or overlap.

Applying paint to uneven or difficult to access spots needs some thorough investigation or employing new tools to enable you to perform an excellent painting job. Nearly every problem has a solution and every now and then a mixture of two does a perfect job that produces excellent outcomes. Before you proceed with the actual painting, you need to prepare your action plan first. This will ensure that you perform an excellent job with fewer inconveniences.

Follow the above tips on how to reach those hard to paint spots and you will be amazed by the final smooth results. If you need any help with your painting project, give us call or email us and we will be more than happy to help bring your favorite colors to live.  

How to Strip Paint on Hard-to-Reach Eaves in Eugene, Oregon.

How to Strip Paint on Hard-to-Reach Eaves in Eugene, Oregon.

Planning your repaint your home’s eaves in Eugene, Oregon? I thought I should share some prep tips for making your exterior painting effortless of a hassle. It’s quite true that stripping off paint from hard-to-reach eaves can prove to be a bit of a headache even to seasoned painters. However, please note that this is NOT applicable to homes built before 1978. On these homes, there is a lead-based paint concern that needs to be handled with the utmost care.

Many homeowners attempting to repaint the eaves of their homes do not do this task as it is supposed to be done, they settle for whatever paint they are able to remove. If all the paint is not removed well, it may cause the house to have mildew and mold sooner than you can imagine, in addition to ending up with a less than perfect paint job. To help you avoid this, here are some pointers that will enable you properly strip paint from your eaves before repainting.

1.    Put everything that you will need to use together before you start doing the actual job. You need protective gears to protect yourself against any injury. Some of the protective gears include a dust mask and protective glasses to prevent dirt from entering your eyes. Prepare the area you will be working around by covering it. Cover everything that may get spoilt by the paint that will be removed with a drop cloth. Cover all the plants with the drop cloth too so that you won’t have much cleaning to do once you’re done.

You will generally need the following items: dust mask, drop cloth, heavy-duty scrub brush with a detachable handle, long broom, bucket of hot water, soap preferably antibacterial, putty knife, duct tape, utility knife, carbide blade paint scraper, gel-type chemical paint stripper, disposable paintbrush, gloves, water hose, sandpaper, ladder, handheld rotary tool, scraping, and sanding accessories.

2.    Get your long broom and attach it to your heavy-duty brush for scrubbing. Get a bucket and warm water with antibacterial soap or detergent. Start scrubbing under the eaves, thoroughly. This will help to make the paint become loose for easy removal. Removing this paint will prevent mildew and other imperfections from manifesting.

3.    Use a paint scraper by attaching it to the broom handle, you can use duct tape to make it more secure. Use a putty knife to remove paint from under the edges, loosen the paint by using force and also use warm soapy water to scrape off the paint

4.    Take the knife off the broom handle by cutting off the duct tape. Use the tape to attach the blade scraper and the broom handle. Next, use of the carbide blade scraper, to remove all the stubborn streaks of paint, you can pull by applying a little pressure to the handle, remove all the excess paint from the surface.

5.    Ensure that you remove any vestiges that are on the surface by using a gel-type chemical stripper. Take off the paint scraper from the broom handle by cutting the duct tape. Replace it with a disposable paintbrush and apply the gel-type chemical using the disposable paintbrush on the areas that are hard to reach.

Replace the paintbrush with the putty knife to scrape away the paint-stripper sludge. Using a water hose pipe, sprinkle some water on the surface and then let the area dry up. Make sure you wear gloves to protect your hands from getting injuries.

6.    Cover the blade of the putty knife with sandpaper and tape it into place to create a makeshift, long-handled sander. Use the putty knife sander to smooth any remaining rough edges under the hard-to-reach areas of the eaves

Detail work may require the use of an extension ladder and an up-close approach. Use a handheld rotary tool and scraping accessory to remove paint vestiges from corners and cracks, and a sanding accessory to prepare the surface for the new paint.

Before going up the ladder, make sure everything that you will need is within reach so that you don’t keep going up and down the ladder. This will save you time and the many trips of going up and coming down the ladder. Start by removing the paint from the areas that are closer to you and work your way to the areas that are far and hard to reach. Scrub the surface with water and leave it to dry.